Showing posts with label MFT Organization for Your Creative Space. Show all posts

Sunday, May 20, 2018

Organizing Your Crafty Stash, Day 5–Stencils, Embellishment, and Tools

Hello and welcome to the last day of MFT’s Organizing Your Crafty Stash feature. Today we’re discussing stencils, embellishments, and tools. That’s a lot of stuff for one post so I’ll be as concise as I can. My craft room is very much a working room—I’m in it most days doing something, and while I put away everything when a project is done, I do like to keep things I use the most often close at hand. This means I don’t have magazine-photo clear desktops. When these photos were taken I was in the middle of prepping for my class for the upcoming MFT Retreat, so it’s a busy room :)

First up, stencils. I store my stencils in sleeves like I store stamps and dies and arrange them according to type: Nature, Geometric, etc. They are in a bin along with molding pastes, palette knives, and anything else that I might use with stencils other than ink. This means I can grab that bin and have everything I need to use my stencils—other than ink. I have boxes of labeled sponge daubers in a drawer right under the bin so I can grab them at the same time if I’m using ink. I have two of some stencils, especially sunrays and brick walls, if I’m going to be doing dry embossing with them. I’ve found inks will stain the stencils and I don’t want any chance of that transferring to my paper so one is strictly for dry embossing and the other for molding pastes and ink.

stencils


I have a ton of embellishments, many of which I don’t use often, if at all, so I’ll show you the ones I use most often. This stack of drawers contains heat embossing supplies in one drawer…

SONY DSC

…and glitter in another. The other four drawers hold miscellaneous tools like punches, rulers, quilling tools, brayers, etc.

SONY DSC


Just above my paper cutting area is a shelf with more drawers where I keep fibers—some ribbons and mostly baker’s twines. Embroidery floss is on bobbins in a case on a shelf—where they’ve been for years but easily accessed if needed.

twine


I keep Sprinkles and other enamel dots in a bin and do the same with my Nuvo drops. I add a sample of each drop on it’s top so I know what it will look like before I use it.

sprinkles

nuvodrops


On top of this set of drawers to the left of my chair I have a simple tote that holds acrylic stamping blocks, several MISTIs (one large one is strictly for backgrounds, the other for larger stamps, but I use the Mini for almost everything else. In that tote I also have a couple of pieces of craft sheet—I use a craft sheet for almost every card for one medium or another--and a small paper cutter handy for trimming card stock.

glitterandtools


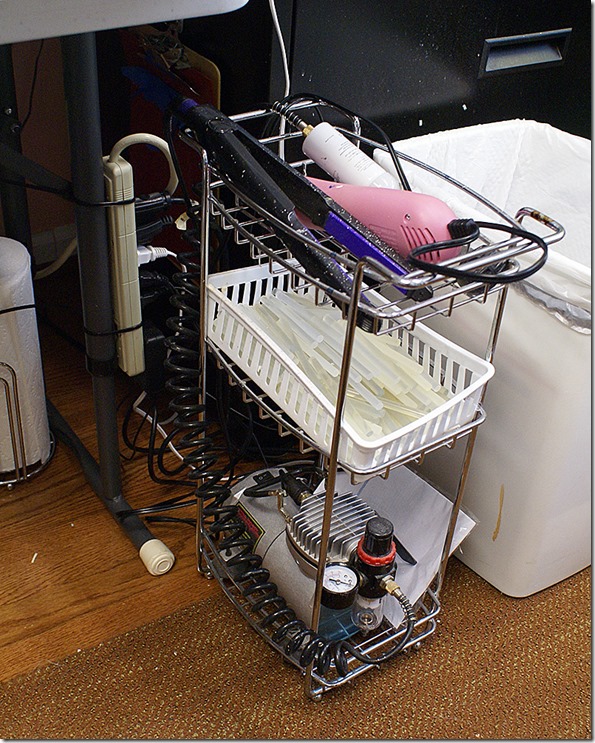
On the other side of my chair is a stand that holds my air compressor, my Copic Airbrush system, a heat tool, and a flat iron (for straightening ribbon or other fiber), along with a tray of glue sticks. I did clean that tray out pre-photo—there were as many small paper scraps in there as there are glue sticks. I toss them in the direction of the trash can and sometimes they make it and sometimes they don’t--I clean up later ;-) My DH strapped a power strip onto a table leg for me so I can plug in lots of things, including the light over my desk. When I flip the switch the light comes on, the glue gun starts to heat, and everything else is ready to go when I need it. Not elegant but oh, so handy!
heattool


On top of my desk I have a tool caddy and a large clear mug from last year’s MFT Retreat. I use it to hold small frequently used tools—it replaced a small canning jar that I used to use. My Scor-Buddy is there, along with my tape runner, glue gun, and a basket with a chamois that I keep wet while I’m working for cleaning stamps. And, of course, my MFT Grid Paper pad—canNOT craft without it. Other small items are also there such as erasers, tapes (regular, repositionable, Post It, foam), and my black inks—they never get put away. Scor-Pal and larger rolls of foam tape are under the desk and more adhesives are in drawers just to the right.
 SONY DSC

SONY DSC

SONY DSC


Moving along to the right is my paper cutting area. I have two paper cutters because I’m lazy. I put a line of foam tape on the 5 1/2” line on one and on the 4 1/4” line on the other as stops. When I go to cut an A2 card base or panel I simply use the stop and don’t have to worry about lining up card stock. Quick and easy! Between them you see a well-used box. I have it divided into months and days and use it to keep me on track for projects due. I’ve used this box for a number of years now and the numbers are coming off the dividers—I guess it needs revamping.

SONY DSC


Next is my die-cutting area. I use a Vagabond for virtually all my die cutting needs. I do drag out my Cuttlebug for dry embossing, however. There’s so much pressure in the Vagabond that paper comes out badly warped—not so from the ‘Bug. I have a small tray to the right where I keep scraps handy. Every now and then I’ll go through it and toss anything that’s ridiculously small. To the left of the Vagabond is a rack with ink sponging handles. I’ve done a bit of rearranging lately so there may be a better place for it now. There’s a stack of drawers under the table to the left—on top is my metal shim and Embossing Pad Combo at the ready. New cutting plates are in the drawers below.

SONY DSC


Three other must-haves for my craft room: my TV and Roku box, my light tent—because I don’t get a lot of natural light into my room—and I’m usually taking photos at night, camera on a tripod, and my furry stamping companion—whichever one decided to visit that day :)
  tv

cameralightbox

pearl


And that’s it from me for Day 5 of MFT’s Organizing Your Crafty Stash feature. There are, of course, too many supplies and other items to show in one blog post but I think I’ve covered the biggies. Hopefully I’ve given you an idea or two to use in your own crafty space.

Thanks so much for stopping by! See you soon!

1newsignature_thumb[1]

Saturday, May 19, 2018

Organizing Your Crafty Stash Day 4–Card Stock, Patterned Paper, and Felt

Hello and welcome back for Day 4 of MFT’s organization series. Today we’re focusing on card stock, patterned paper, and felt. These items can get a little overwhelming sometimes, so it’s really helpful to have them organized and contained so you don’t waste time searching for what you need.

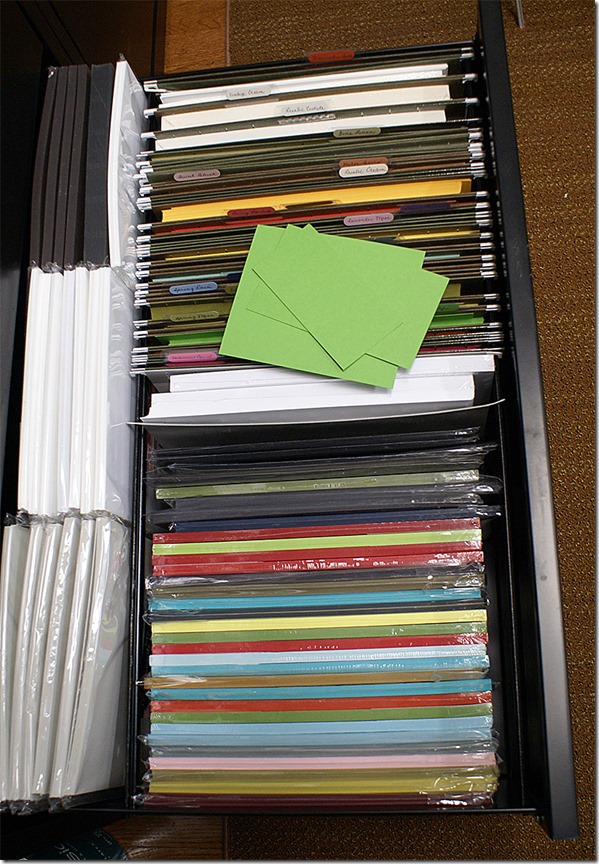
First up, card stock. I store all my card stocks in vertical files. Most things I like out in the open so I can see what I’ve got but not card stock. I want it protected from light and dust so I use a filing cabinet. I used to use a regular filing cabinet but I finally got tired of skinned knuckles and not being able to get to the very back so I invested in these vertical filing cabinets.

This drawer holds about half of my MFT card stock with watercolor paper, clear acetate, and Copic paper at the far end. There’s room at the side for extra packs. See how far it opens? No problem at all getting to anything I want.

cardstock1


This one holds more extras (no, I don’t EVER want to run out of card stock, LOL!) and some miscellaneous card stock that I use when I need to make templates, etc.

cardstock2


This one holds the rest of my MFT card stock plus all the metallics: sparkle & shine, along with the wood adhesive backed sheets. And more extras ;-)

cardstock3


I love this little file box that I keep handy near my desk. In it are A2 size panels of all MFT card stocks. When I cut a new sheet up for a project, the rest of it goes in here so if I need less than a sheet for anything I pull one of these out and don't have to go to the filing cabinet.

cardstock4


My patterned paper is kept in another Fridge Binz container in labeled sleeves. Scraps are inside the pad and the pads are in alphabetical order. Duplicate pads are in a box to the left. This container holds 30 pads comfortably.

patternedpaper1


I put them in the sleeves upside down because almost all of my pads come apart at the binding after I pull out several sheets. This keeps the binding at the bottom so it’s easier to get to remaining sheets in the pad—sometimes I don’t ever have to take them out of the sleeve ;-)

patternedpaper2


I print off the color chart from the MFT blog and tape it to the back of each pad for a handy reference of the colors included in each pad. This is really helpful to me—I resisted for a long while and spent way too much time online looking up what colors were used with which papers. This is such a time saver that it’s well worth the ink!

patternedpaper3


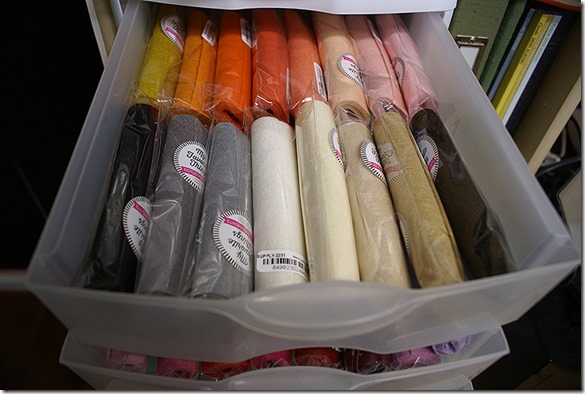
I store my felt in a Sterlite drawer container according to color. I leave them in the original packaging. The name is on the package so I don’t feel a need to re-lable—why reinvent the wheel if it works, right?

felt

SONY DSC

SONY DSC

felt4


And that’s it for my organizational tips on card stock, patterned paper, and felt. I hope you’ve found at least a little something helpful today.

Thanks so much for stopping by—see you back tomorrow for the final day of MFT’s Organizing Your Crafty Stash feature.

1newsignature_thumb[1]

Friday, May 18, 2018

Organizing Crafty Stash Day 3—Die-namics

Hello, welcome back to Day Three of MFT’s Organizing Crafty Stash series. Today we’re talking about Die-namics storage.

All of my Die-namics that coordinate with a stamp set are stored with the stamp set in the back of the pouch—this only makes sense to me. If there is more than one piece it’s stored on magnets to decrease the chance of loosing a piece.

SONY DSC


Other Die-namics are stored in the same kind of bins that I used for stamps and are organized by type, i.e., Nature, STAX, Sentiments, etc. I store my Die-namics in the same kind of pouches in which I store my stamps. I started using CD sleeves before MFT started carrying that size so I have some of both, then for the larger die sets I use the next size up.

diestorage


This shelf also slides out so I can see everything in the bins.

diestorage2


Again, any set with multiple pieces, especially if they are small pieces, is stored on magnets in the sleeve/pouch.

SONY DSC


Any extra die cuts I might have are stored in the back of the pouch—storing in the front with the die blade up can damage the die cut so they go in the back. When I pull out a die I always look to see if there are any extras and use them if they will work on the project I’m working on.

SONY DSC


Finally, if you saw my very first die storage system you saw these doors. I got to the point they were overflowing so that’s when I went to the pouch system. I still love that everything is visible at a glance so I now just use them for Blueprints and Cover-Ups. And my A2 Rectangles that I want handy at all times.

diesondoors

And there you have my Die-namics storage system. As with my stamps, it’s nice to have everything in the bins and in alphabetical order—it’s a lot of work to set up at the beginning but it absolutely saves time when creating. I have a rule that the first thing I do when I get new product is to sit down and package it so everything is always up to date.

Thanks so much for stopping by! I hope you’ve gotten an idea or two that you can use in your crafting space. See you back tomorrow for more organizing ideas!

1newsignature_thumb[1]

Thursday, May 17, 2018

Organizing Crafty Stash Day 2—Stamps

Hello and welcome back to Day 2 of MFT’s Organized Crafty Stash! Today we’re discussing stamp storage. My organization is pretty much like many crafters use: storage pockets in some kind of container—nothing extraordinary but it works and that’s all that matters.

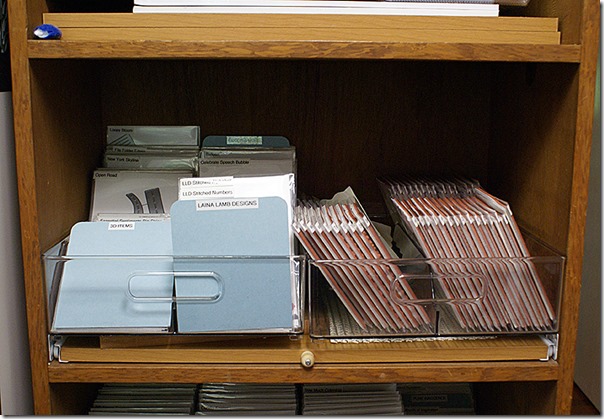
I have a cabinet in my craft room in which I store my stamps. I could paint it but it has some sentimental value just like it is so it stays. One whole shelf is dedicated to stamps that are organized by line in two-sided Fridge Binz. I made my dividers from heavy duty file folders.

stampstorage1


My wonderful and handy DH installed a pull out shelf on rails for me so I can see everything and be able to pull what I want easily when I’m ready to use a set.

stampstorage2


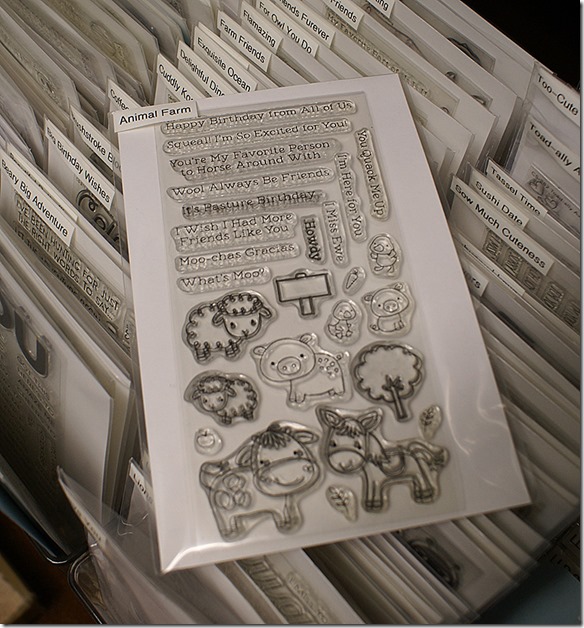
Each set is stored in a storage packet from the MFT store and labeled with the set name and stored in alphabetical order. This really makes it easy to find a set. I’ve been using this system for about two years—before, I really had no system and it wasn’t pretty--I spent a lot of time searching.

stampstorage3


I store my background stamps in a similar way. They are also in a bin in 6” x 6” page protectors, also available in the MFT store.

SONY DSC


Here’s what the page protector looks like—laying on black paper so you can see better. I just trim off the side tab with the binder holes because I have no plans to put them in a binder, but you certainly could do that. Some backgrounds are a tight fit but so far I’ve not found any that would not fit inside these page protectors.

stampstorage6


I use this label maker. It’s not the latest and greatest, I’ve had it a long time and it works, so I see no reason to replace it.

stampstorage4


And that’s it about my stamp storage. I think the most important part of it is the labeled storage packets arranged in alphabetical order. If you have that, in place, any container that will let you see the labels is good.

Thanks so much for stopping by today! See you back tomorrow for more organizational ideas!

1newsignature_thumb[1]

Friday, March 13, 2015

Organization for Your Creative Space—Taming Your Tools

toolorganizationcollage_2015mar13


Hi, everyone and welcome to this month’s MFT Organization for Your Creative Space—Taming Your Tools. I don’t have any magical system—it’s just kind of evolved according to my needs and acquisitions but it works for me. I’ll take you on a tour around my room and show you where and how I store my tools.

Print
My craft room is a bed room turned Girl Cave. I didn’t want to do any built-ins because I want everything out where I can see it or I’ll forget I have it. I’m not interested in cabinets and I don’t want things behind closed doors, so I just have work tables and shelves. Starting with the right wall as you come into the room you’ll see a table with my sewing machine (which I rarely use any more—funny since I used to have to MAKE myself NOT use it, LOL!), a Cuttlebug, and my Vagabond. Behind the Vagabond is a two tiered stamp holder for my Ranger sponge handles.


SONY DSC

I keep the Cuttlebug handy for embossing with Cover-Up Die-namics. I broke a Vagabond once by accidentally trying to run too much through it and I’m chicken to try a Cover-Up since it needs a mat ;-) Cuttlebug works great and if I break it, I have another ;-)

Under my Vagabond I have some stacked Sterlite drawers that contain a supply of new cutting pads for the Vagabond and on top of it are my embossing mats and my metal shim, always handy for when I need them.

SONY DSC


Moving around, I have a desktop paper cutter and a Zutter paper cutter that I use solely for cutting card bases.

SONY DSC


On the floor, and to the right of my work table, I have a metal stand that was intended for use in a bathroom but I decided it would be great to hold my air compressor on the bottom, a tray of glue sticks in the middle, and the basket on top is perfect for my Copic air brush handle, my heat gun, and a flat iron—right at hand.


SONY DSC


Now on to my work table. I am someone who likes to have everything right at hand as much as possible. I have my brand new favorite tool, the MISTI at hand all the time as well as a pair of reading glasses ;-)

To the right of my Copic markers you’ll see my Score Buddy, I have a pair of scissors that I only use on fibers—no paper—and my hot glue gun. I use it a lot and don’t want to wait for it to heat up so I have it plugged into a power strip along with my desk light so that when I turn my desk light on, it comes on and starts heating. Similarly, when I turn that light off, the hot glue gun also goes off, so I don’t have to worry about whether I turned it off or not after I leave the room. My ATG tape runner resides in front of my Copic markers…

SONY DSC


…as does a small canning jar with small tools I use constantly like several different pairs of sharp scissors and tweezers, etc…

SONY DSC


…and to the left is my tool carousel in which I keep longer tools like bone folders, pens, 6” rulers, my Quik Stix, stylus, hemostat, wire cutters, utility scissors, and stapler.

SONY DSC

I have another stack of Sterlite drawers to my left, under my work table. The top drawer holds new cutting blades for my small paper trimmer, larger rulers, paper piercers, quilling tools, spare blades for my craft knife and similar sharp items. I know when I go into that drawer to be very careful.

SONY DSC


The next couple of drawers hold embossing powders and glitter, but this drawer holds a Crop-O-Dile, Corner Chomper, brayers, crimper, and various small punches.

SONY DSC


On TOP of that stack of drawers, I have a small tote that holds all of my acrylic blocks plus my small paper trimmer.

SONY DSC


And that’s pretty much it as far as my tool organization and storage—my main goal is to have everything handy for better efficiency, and this works for me. I hope I might have given you some ideas for making your space work a little more efficiently for your needs. Thanks so much for stopping by! See you soon!


1CAS-Signature2_thumb1