
Welcome back to Day Two of MFT’s August Release Countdown! It won’t be long now—Release is tomorrow night, August 2nd, at 10pm EDT. Be sure to check by the MFT Blog for all the details. Today we’re previewing Soak up the Fun Stamp Set, Soak up the Fun Die-namics, Whimsical Waves Background, and Stitched Whimsical Waves Die-namics.

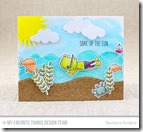
I have a couple of very different cards for you today using these products. My first card reminds me of the times I’ve been snorkeling in Belize—I loved it and hope to do it again. It’s pretty amazing and so much fun. This card started with a Sweet Tooth card stock base on which I built my scene. First I stamped Whimsical Waves Background on Ranger Watercolor Paper with Versamark, heat embossed with white detail embossing powder and applied a watercolor wash with Peerless Watercolors and a waterbrush for the sky and sea.
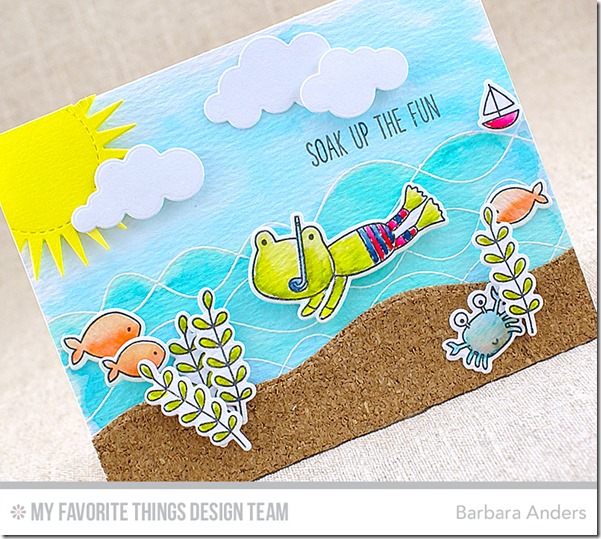
I adhered that to my card base then added Cork Sheets for the “sand”, Radiant Sun Die-namics, cut from Sunshine card stock and Puffy Clouds Die-namics cut from Sweet tooth card stock. I stamped the sentiment with Black Licorice hybrid ink. Then I stamped the images from Soak Up the Fun on more watercolor paper with Black Licorice hybrid ink, cut them out with Soak Up the Fun Die-namics, watercolored them with Peerless Watercolors and a waterbrush, popped them up on foam mounting tape and was done!
*****
My second card reminds me of the aquariums you sometimes see in restaurants, LOL!

I started with a Sweet Tooth card stock base. Using another piece of Sweet Tooth card stock, I cut a window with Inside & Out Stitched Circle STAX Die-namics because I knew I wanted to make a shaker card. Next I stamped Whimsical Waves Background with Versamark on Ranger Watercolor Paper, heat embossed with white detail embossing powder, and again, applied a watercolor wash with Peerless Watercolors and a waterbrush. I created a shaker element using Heat Resistant Acetate card stock for the window, foam mounting tape, 6mm Sand sequins and 4mm Sand sequins.

I stamped the images from Soak Up the Fun on Ranger Watercolor Paper with Versamark and heat embossed with white detail embossing powder, cut them out with Soak Up the Fun Die-namics, and watercolored them. The sentiment was stamped with Versamark on Lush Lagoon card stock cut with Blueprints 2 Die-namics, heat embossed with white detail embossing powder, and popped up on foam.
The whale image was mirror-image stamped using the new Mirror Image stamp. Have you ever wished an image was oriented in the opposite direction than it is? Often a project design would work better if this were the case and Mirror Image Stamp Set allows you to do just that. Here’s a photo tutorial that I shared on the MFT Blog showing how that was done, albeit using other images.
1.For my first example I‘m going to use the cutie hedgehog image from Warm & Fuzzy Friends Stamp Set, Ranger Watercolor Paper, stamp with Versamark, and heat emboss with white detail embossing powder.

2.Using the Mini MISTI (obviously you can use the regular sized one, too), remove the black foam pad and place a piece of clear acetate in the corner with stamp mounted as if it was on a stamping block. Mount Mirror Image Stamp on the door so that it will cover the stamp.

3.Ink up the stamp with Versamark, close the door, and stamp onto Mirror Image Stamp. Do this gently; pushing firmly may move the door slightly, distorting the image. Repeat.

4. Working quickly, open door, remove acetate with the stamp, replace black foam pad, and place watercolor paper into Mini MISTI in the same place. Close door and press down firmly-the image stamped on Mirror Image Stamp with Versamark will transfer to the paper. Repeat steps 3 & 4.
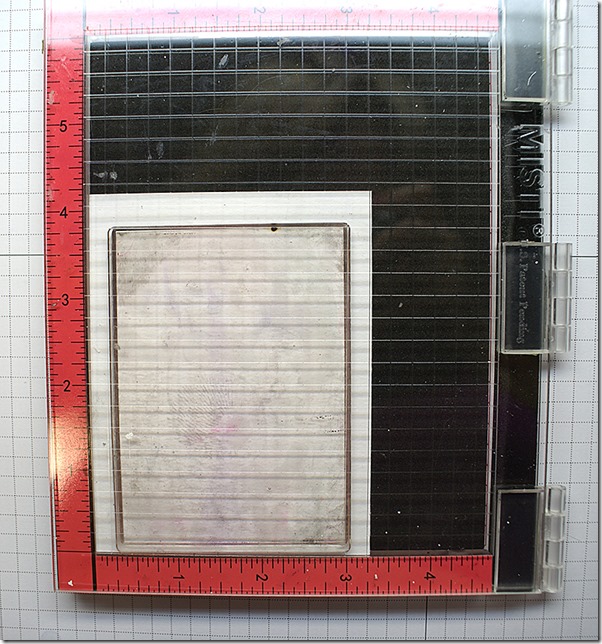
5. Heat emboss with white detail embossing powder. The image on the bottom is the mirror image and on the top is one stamped normally.
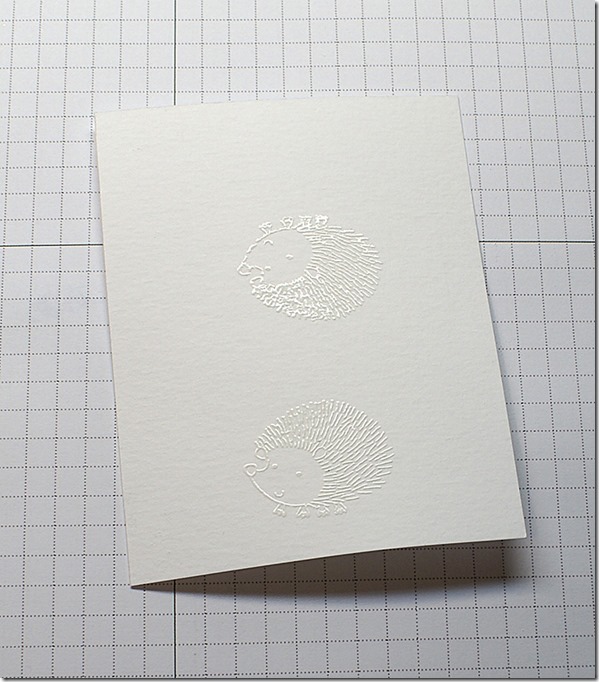
6. Here the images are watercolored to show more detail.

7. For my second example I’m going to stamp on Copic friendly paper with Versafine. Versafine works well because it stays wet long enough to apply heat embossing. I’m using my favorite little parrot from BB Polynesian Paradise.
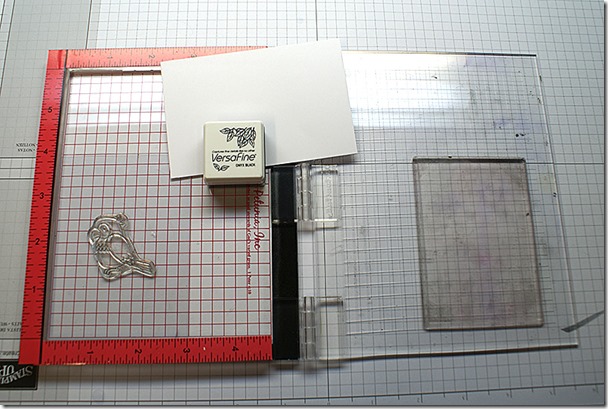
8. Employing the same technique, remove the foam pad from the Mini MISTI, ink up the image with Versafine (I’m using Onyx Black), close the door and lightly stamp the image onto Mirror Image Stamp. Repeat steps for complete coverage.

9. Here I’ve applied clear detail embossing powder…

10. …and heat embossed. The image on the right is the mirror image, stamped on X-Press It Blending Card and the one on the right is the original, stamped on Neenah Classic Crest, Solar White.

And that’s it! Sorry for the long post but I wanted you to see how easy using the Mirror Image Stamp Set is. Thanks for stopping by! See you soon!


~Supplies~
Snorkeling Card:
Stamps: Soak Up the Fun, Whimsical Waves Background (MFT)
Ink: Black Licorice hybrid ink, Versamark (MFT)
Paper: Sweet Tooth card stock, Sunshine card stock, Ranger Watercolor Paper (MFT)
Accessories/tools: Vagabond; Soak Up the Fun Die-namics, Radiant Sun Die-namics, Puffy Clouds Die-namics, Stitched Snow Drifts Die-namics, foam mounting tape, white detail embossing powder, Embossing Magic, Cork Sheets, Peerless Watercolors, waterbrush (MFT)
Whale Card:
Stamps: Soak Up the Fun, Whimsical Waves Background, Mirror Image (MFT)
Ink: Versamark (MFT)
Paper: Sweet Tooth card stock, Lush Lagoon card stock, Ranger Watercolor Paper, Heat Resistant Acetate card stock (MFT)
Accessories/tools: Vagabond; Soak Up the Fun Die-namics, Blueprints 2 Die-namics, Inside & Out Stitched Circle STAX Die-namics, foam mounting tape, white detail embossing powder, Embossing Magic, Peerless Watercolors, waterbrush, 6mm Sand sequins, 4mm Sand sequins, Mini MISTI (MFT)


