Mixing and matching Blueprints elements is such an appealing way of creating something new and exciting. Sometimes though, you need a card and you need it in a hurry…enter Blueprints sketches. Every new Blueprints release includes a quartet of sketches featuring the elements. You choose the papers and stamps to coordinate but the design is done for you - easy peasy! Join our team this month as they interpret Blueprints sketches and make them their own.
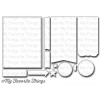
Blueprints really are great for putting a card together in a hurry. For this one I used Blueprints 13 Die-namics. I started with a Sweet Tooth card stock base, then added a layer of Graphic Grid Paper Pack. Next is the bracket element that I cut from X-Press It Blending card, then stamped it all over with Sushi Date stamp set and Black Licorice hybrid ink, then colored with Copic markers and popped it up on foam.
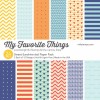
Next I cut Sweet Sunshine Paper Pack and layered it on Black Licorice card stock and popped it up on foam. I stamped the image from Sushi Date on X-Press It Blending Card, colored with Copic markers, fussy cut it out, and popped it up on foam. To finish, I cut the arrow element from Black Licorice card stock, stamped the sentiment with Versamark, heat embossed with white detail embossing powder, and popped it up as well.
And that’s it from me today! Thanks so much for stopping by! See you soon!
~Supplies~
Stamps: Sushi Date (MFT)
Ink: Black Licorice hybrid ink, Versamark (MFT)
Paper: Sweet Tooth card stock, Black Licorice card stock, Graphic Grid Paper Pack, Sweet Sunshine Paper Pack, X-Press It Blending Card (MFT)
Accessories/tools: Vagabond; Blueprints 13 Die-namics, foam mounting tape, white detail embossing powder, Embossing Magic, MISTI (MFT); Copic markers, heat tool







Great card Barbara! I really need to use the blueprints! It makes designing the card look so easy!
ReplyDeleteI like how you anchored that little guy to the circle element. I love my many Blueprints
ReplyDeleteYour card made me smile...big time. What an awesome card!
ReplyDelete